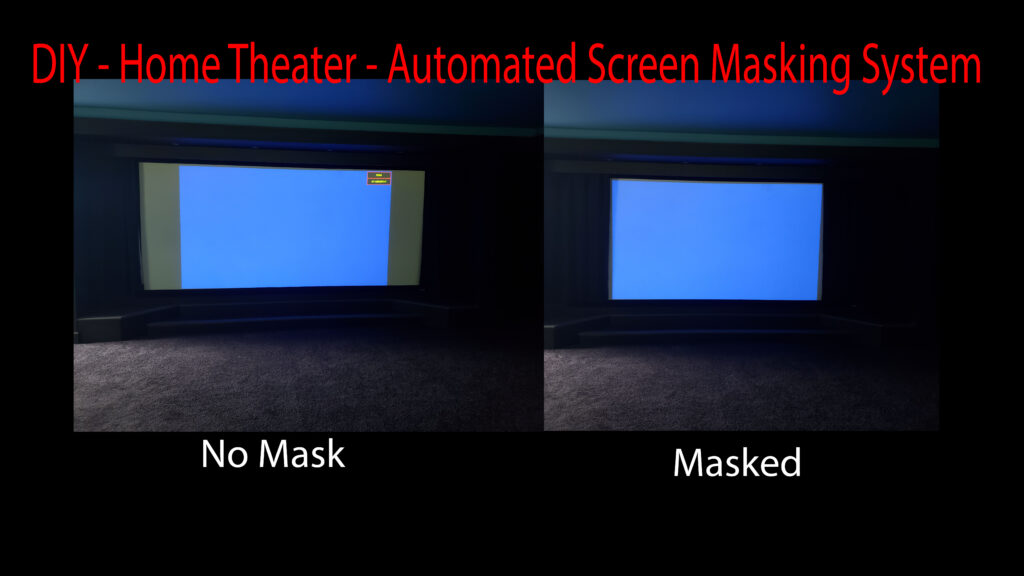
Anyone who has a wide format projection screen knows how annoying the white bars on the sides can be when displaying 16:9 content. If you have looked into masking systems then you also know how expensive that problem can be to solve.
In this post I show you how I built my own automated masking system that can also be used for automating a full screen curtain, for fractions of the cost of retail systems.
NOTE: Since purchasing my curtain motor, the manufacturer has come up with an even better solution. Most of these instructions still apply, but you will see that they now have their own curtain headrails that will be easier to automate than the Home Depot headrails that I used. I will provide links to their new kits, but note that they are little different than what I used. I will also try to point out where there will be some differences.
Materials List
The Headrails
Headrail Mounted
The headrails are metal channels that hold curtain hooks that slide back and forth across a rail. They hold the curtain and allow it to easily open and close.
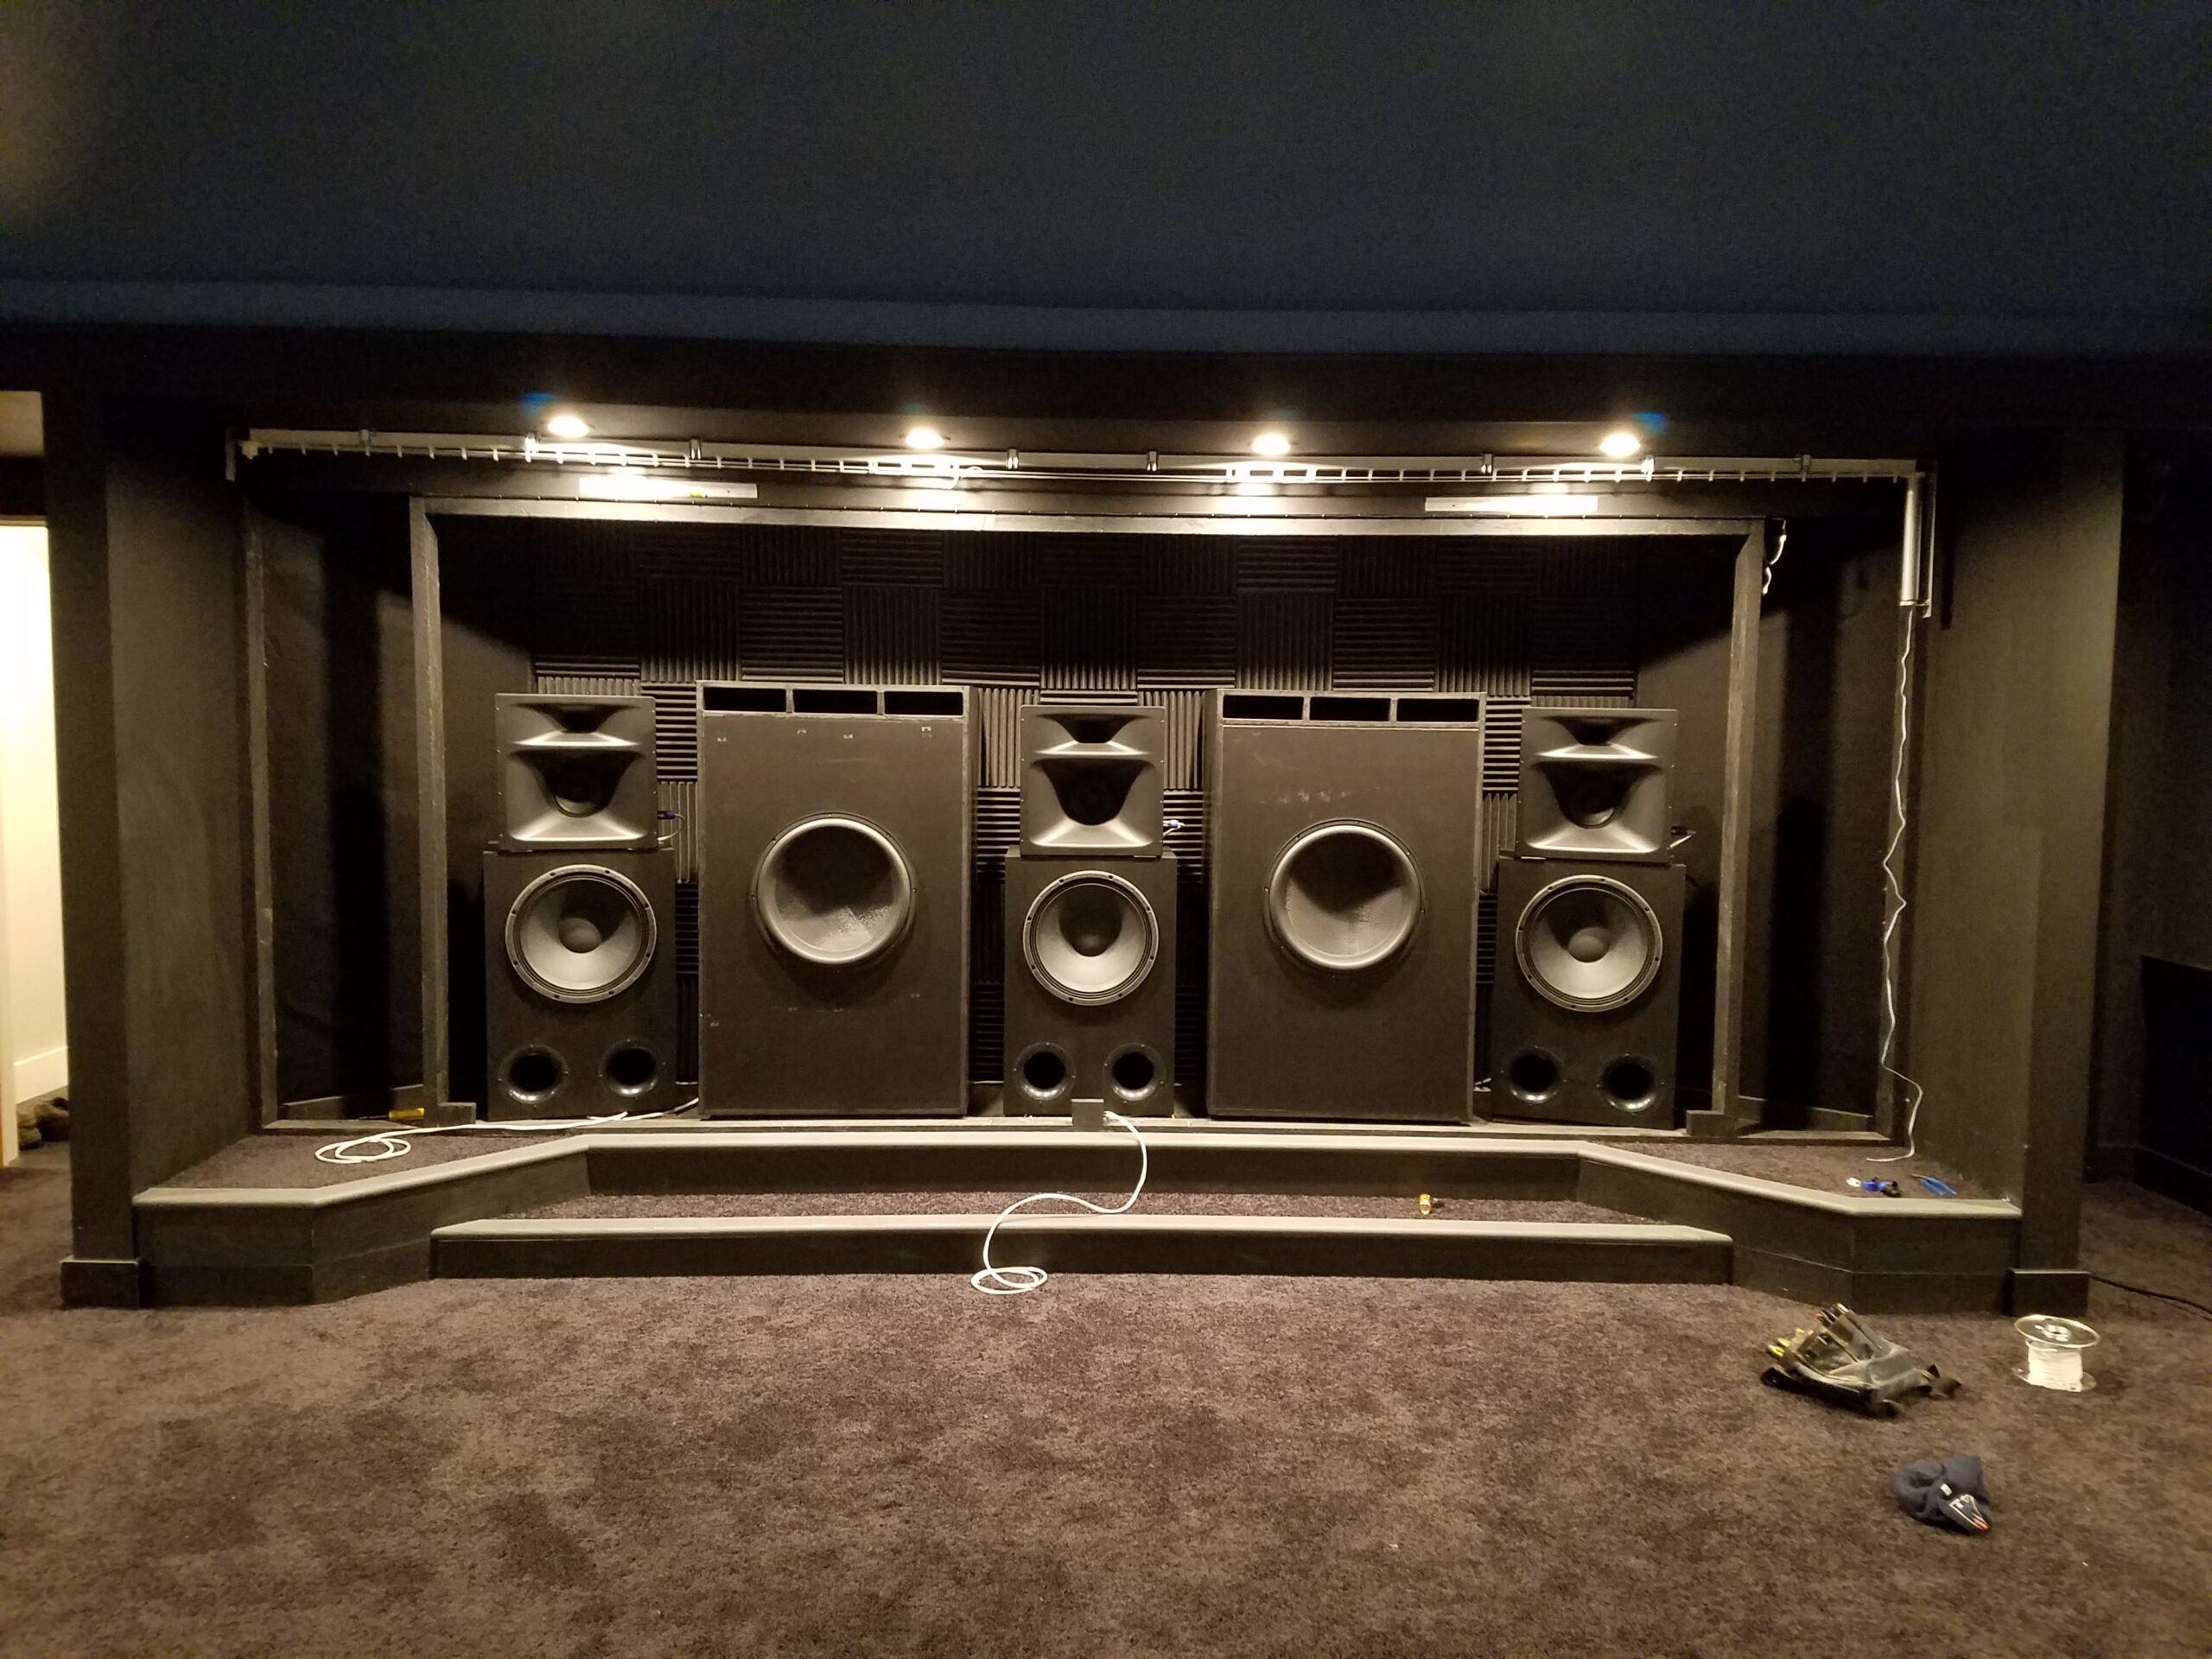
Measure the distance between the walls on each side of your screen. If you don't want the curtain to go all the way to the wall, then use a number that matches how wide you want the curtains. Be sure to have enough room on each side of the screen for all of the curtain material to fully clear the edge of the screen. Also leave about 4 or 5 inches on each side for the motor and idler pulleys. (See image above)
Once you have that number, divide it in half. This is the length that you want to use for each of the headrails. I used these Home Depot Headrails, but as I mentioned above, the motor manufacturer now offers their own headrails that look like they will be much easier to automate, so I would go with those.
Mount the headrail to the ceiling in front of your screen as shown below. Be sure to leave enough room so that the curtain doesn't hit the screen frame. They should come with mounting brackets and instructions. The two headrails should come together at the center of the screen so that the curtains are equidistant from each end of the screen and meet in the middle.
The Motor and String
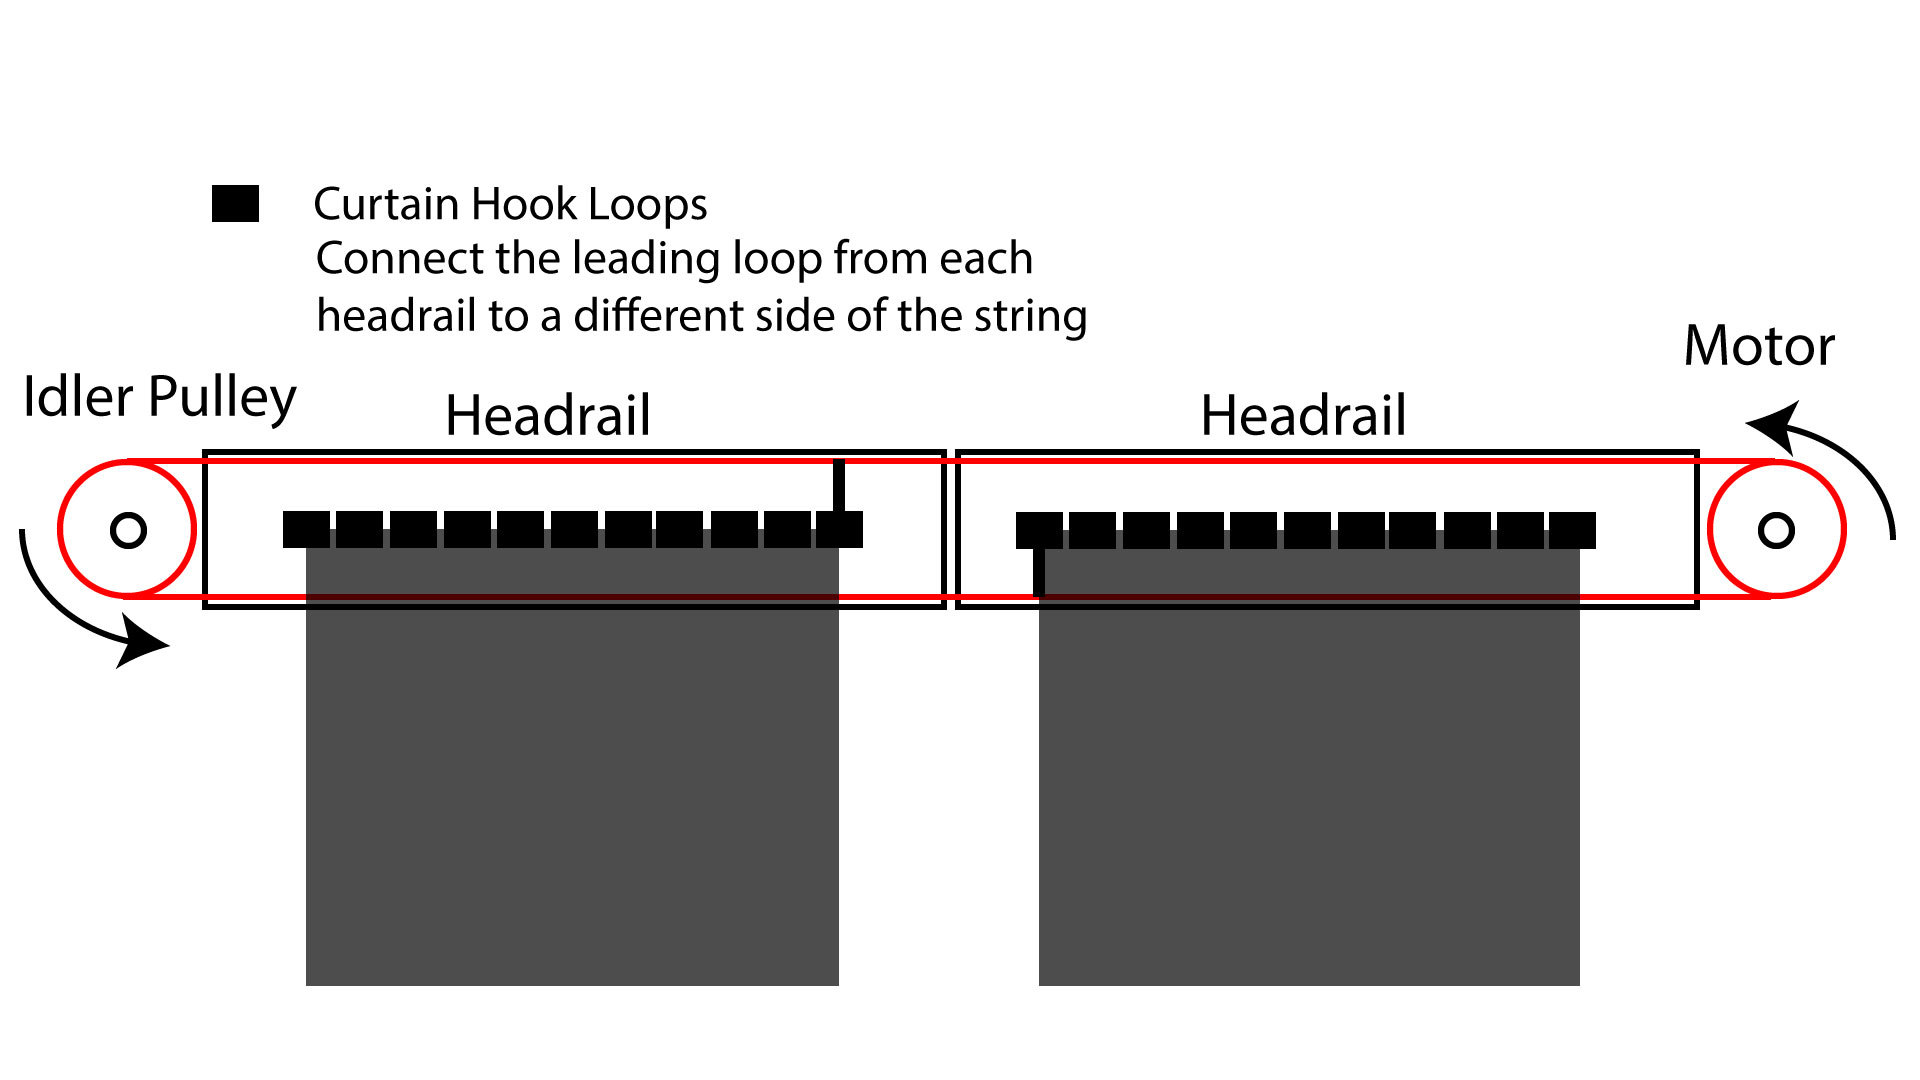
The curtain kit should also come with instructions, but below is how I connected mine. Attach the lead curtain hook from each headrail half to a different side of the string. This allows the curtains on each side to open and close at the same time.
Headrail Layout
Wiring
Electronics
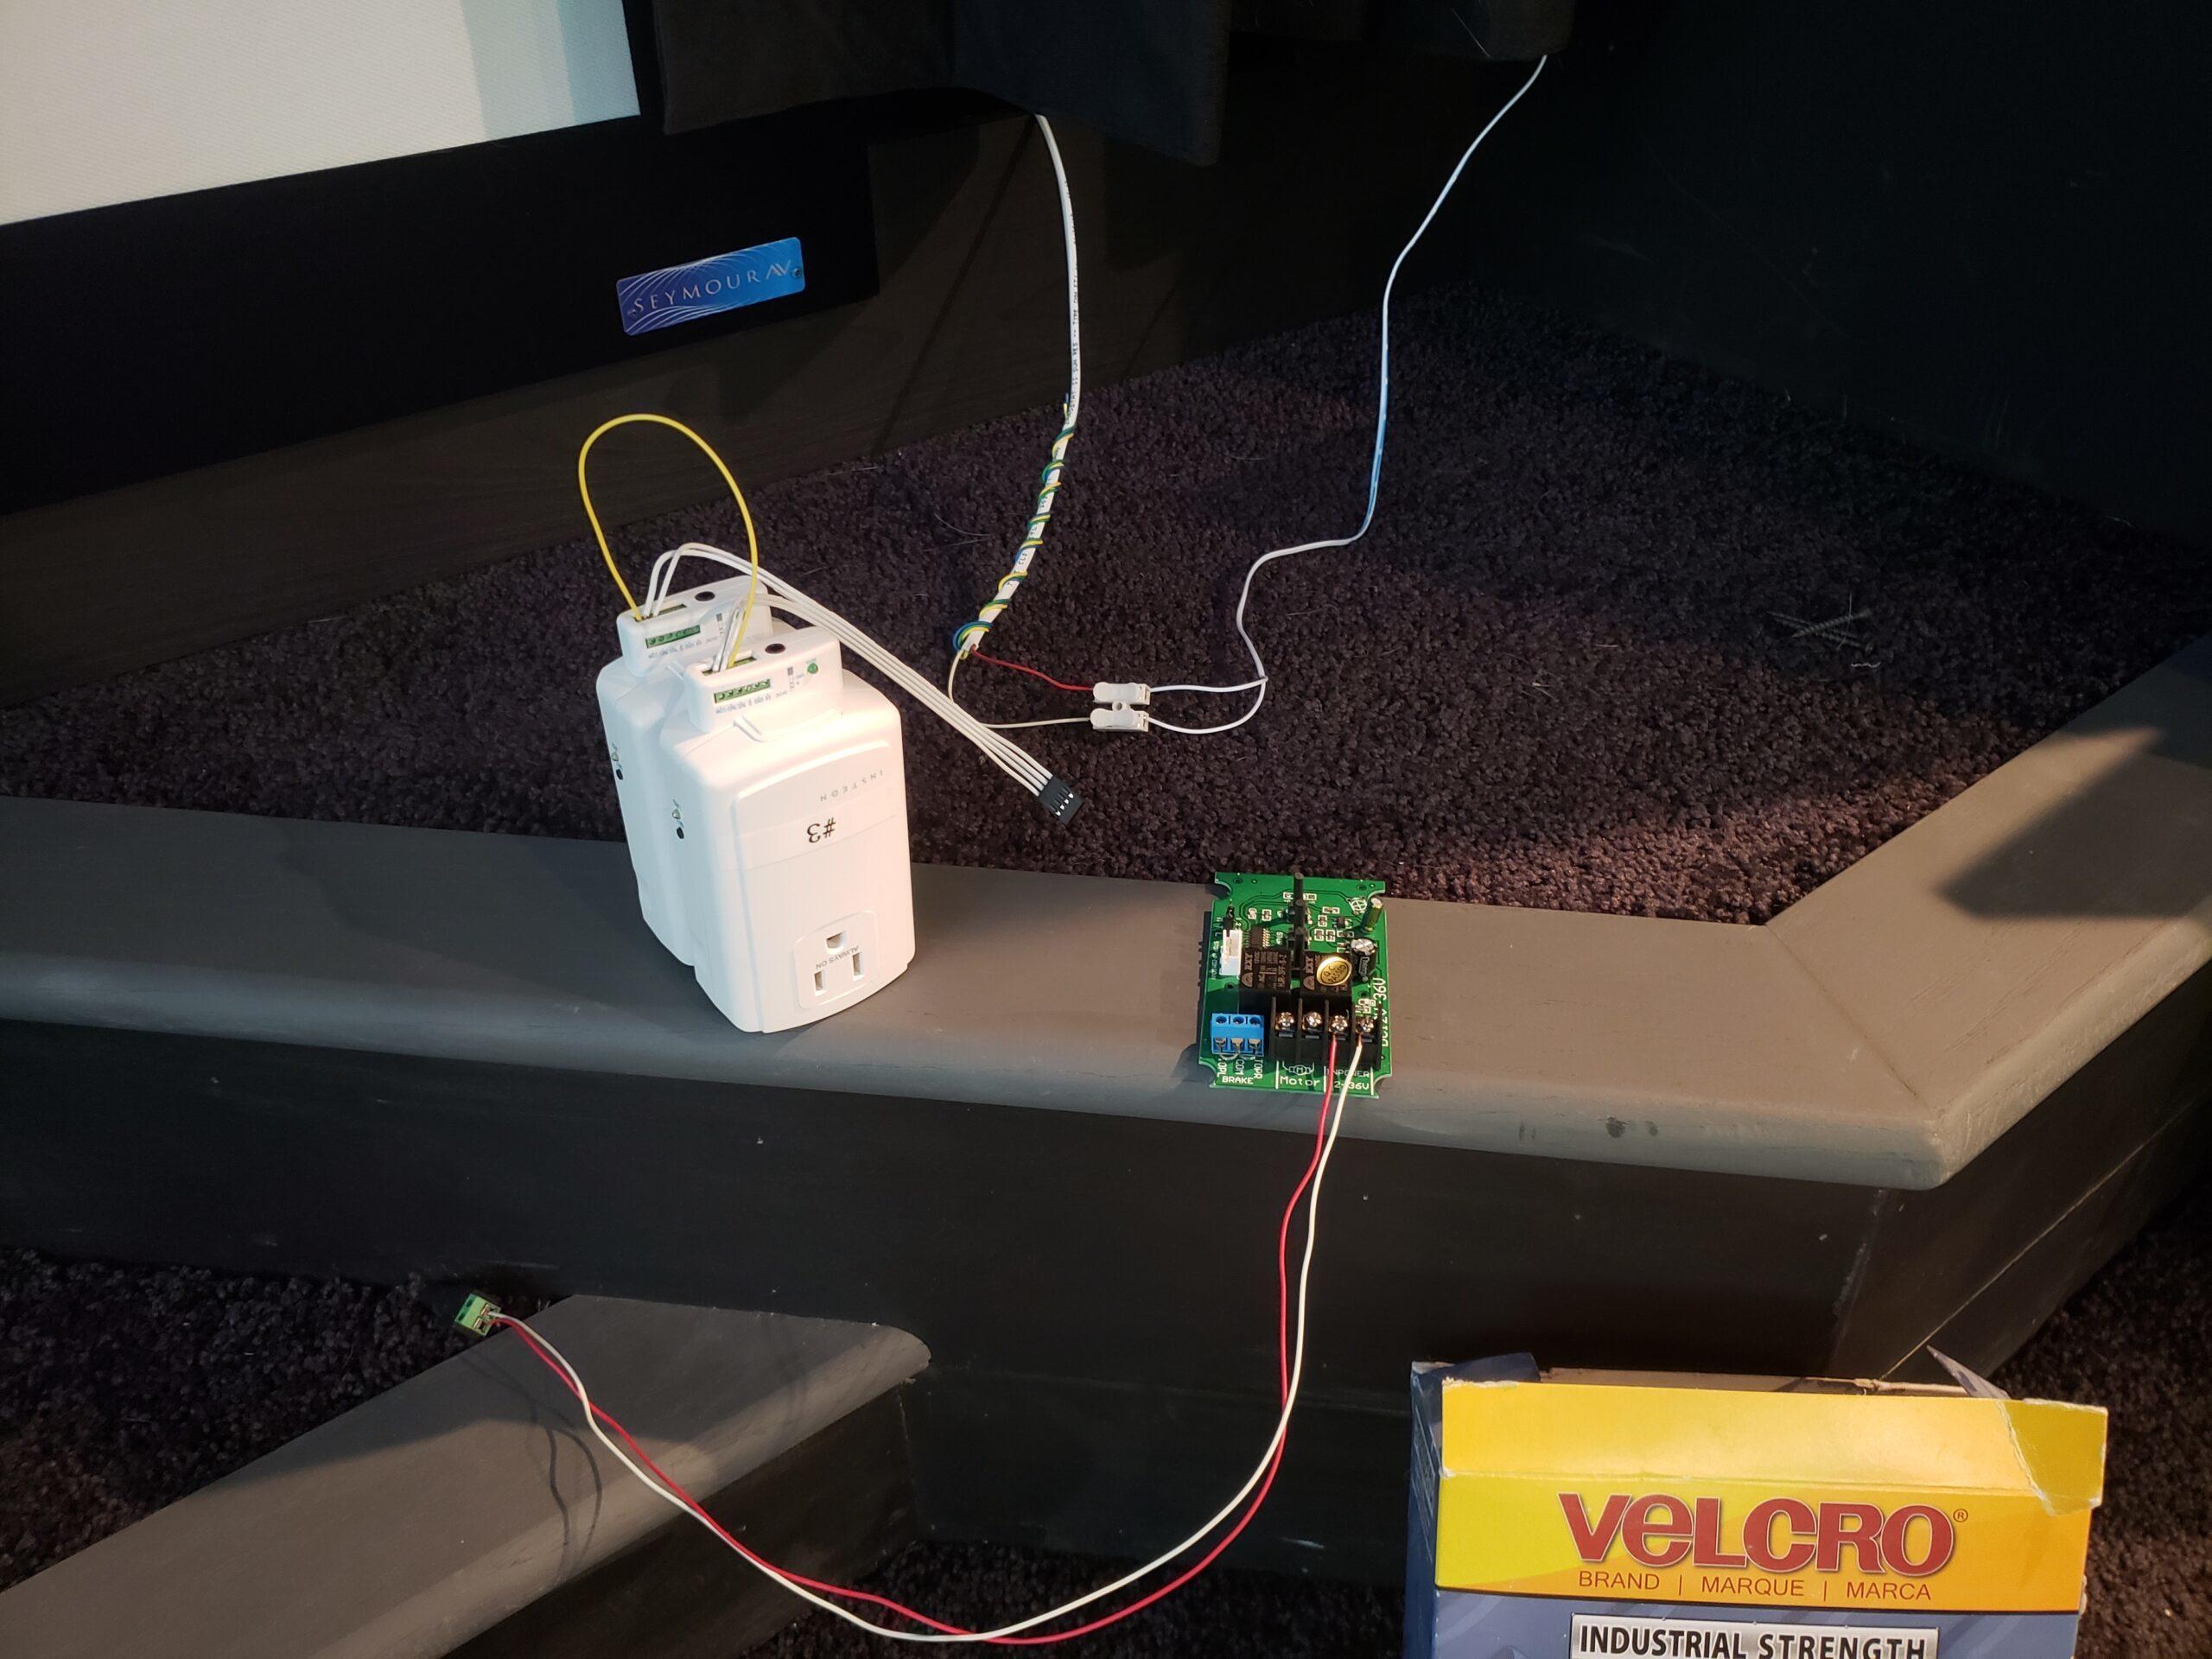
The wiring is exactly the same as it was for the automated roller shade project that I documented. Here is a link to that video and blog.
Run 18AWG thermostat wire from your screen location to an area where you can store the electronics. This won't take much room, but you will need an outlet for the 12v power supply. I use Leviton boxes in my home theater closet to house all of my low voltage lighting, blind control, screen curtain control and hidden door control.
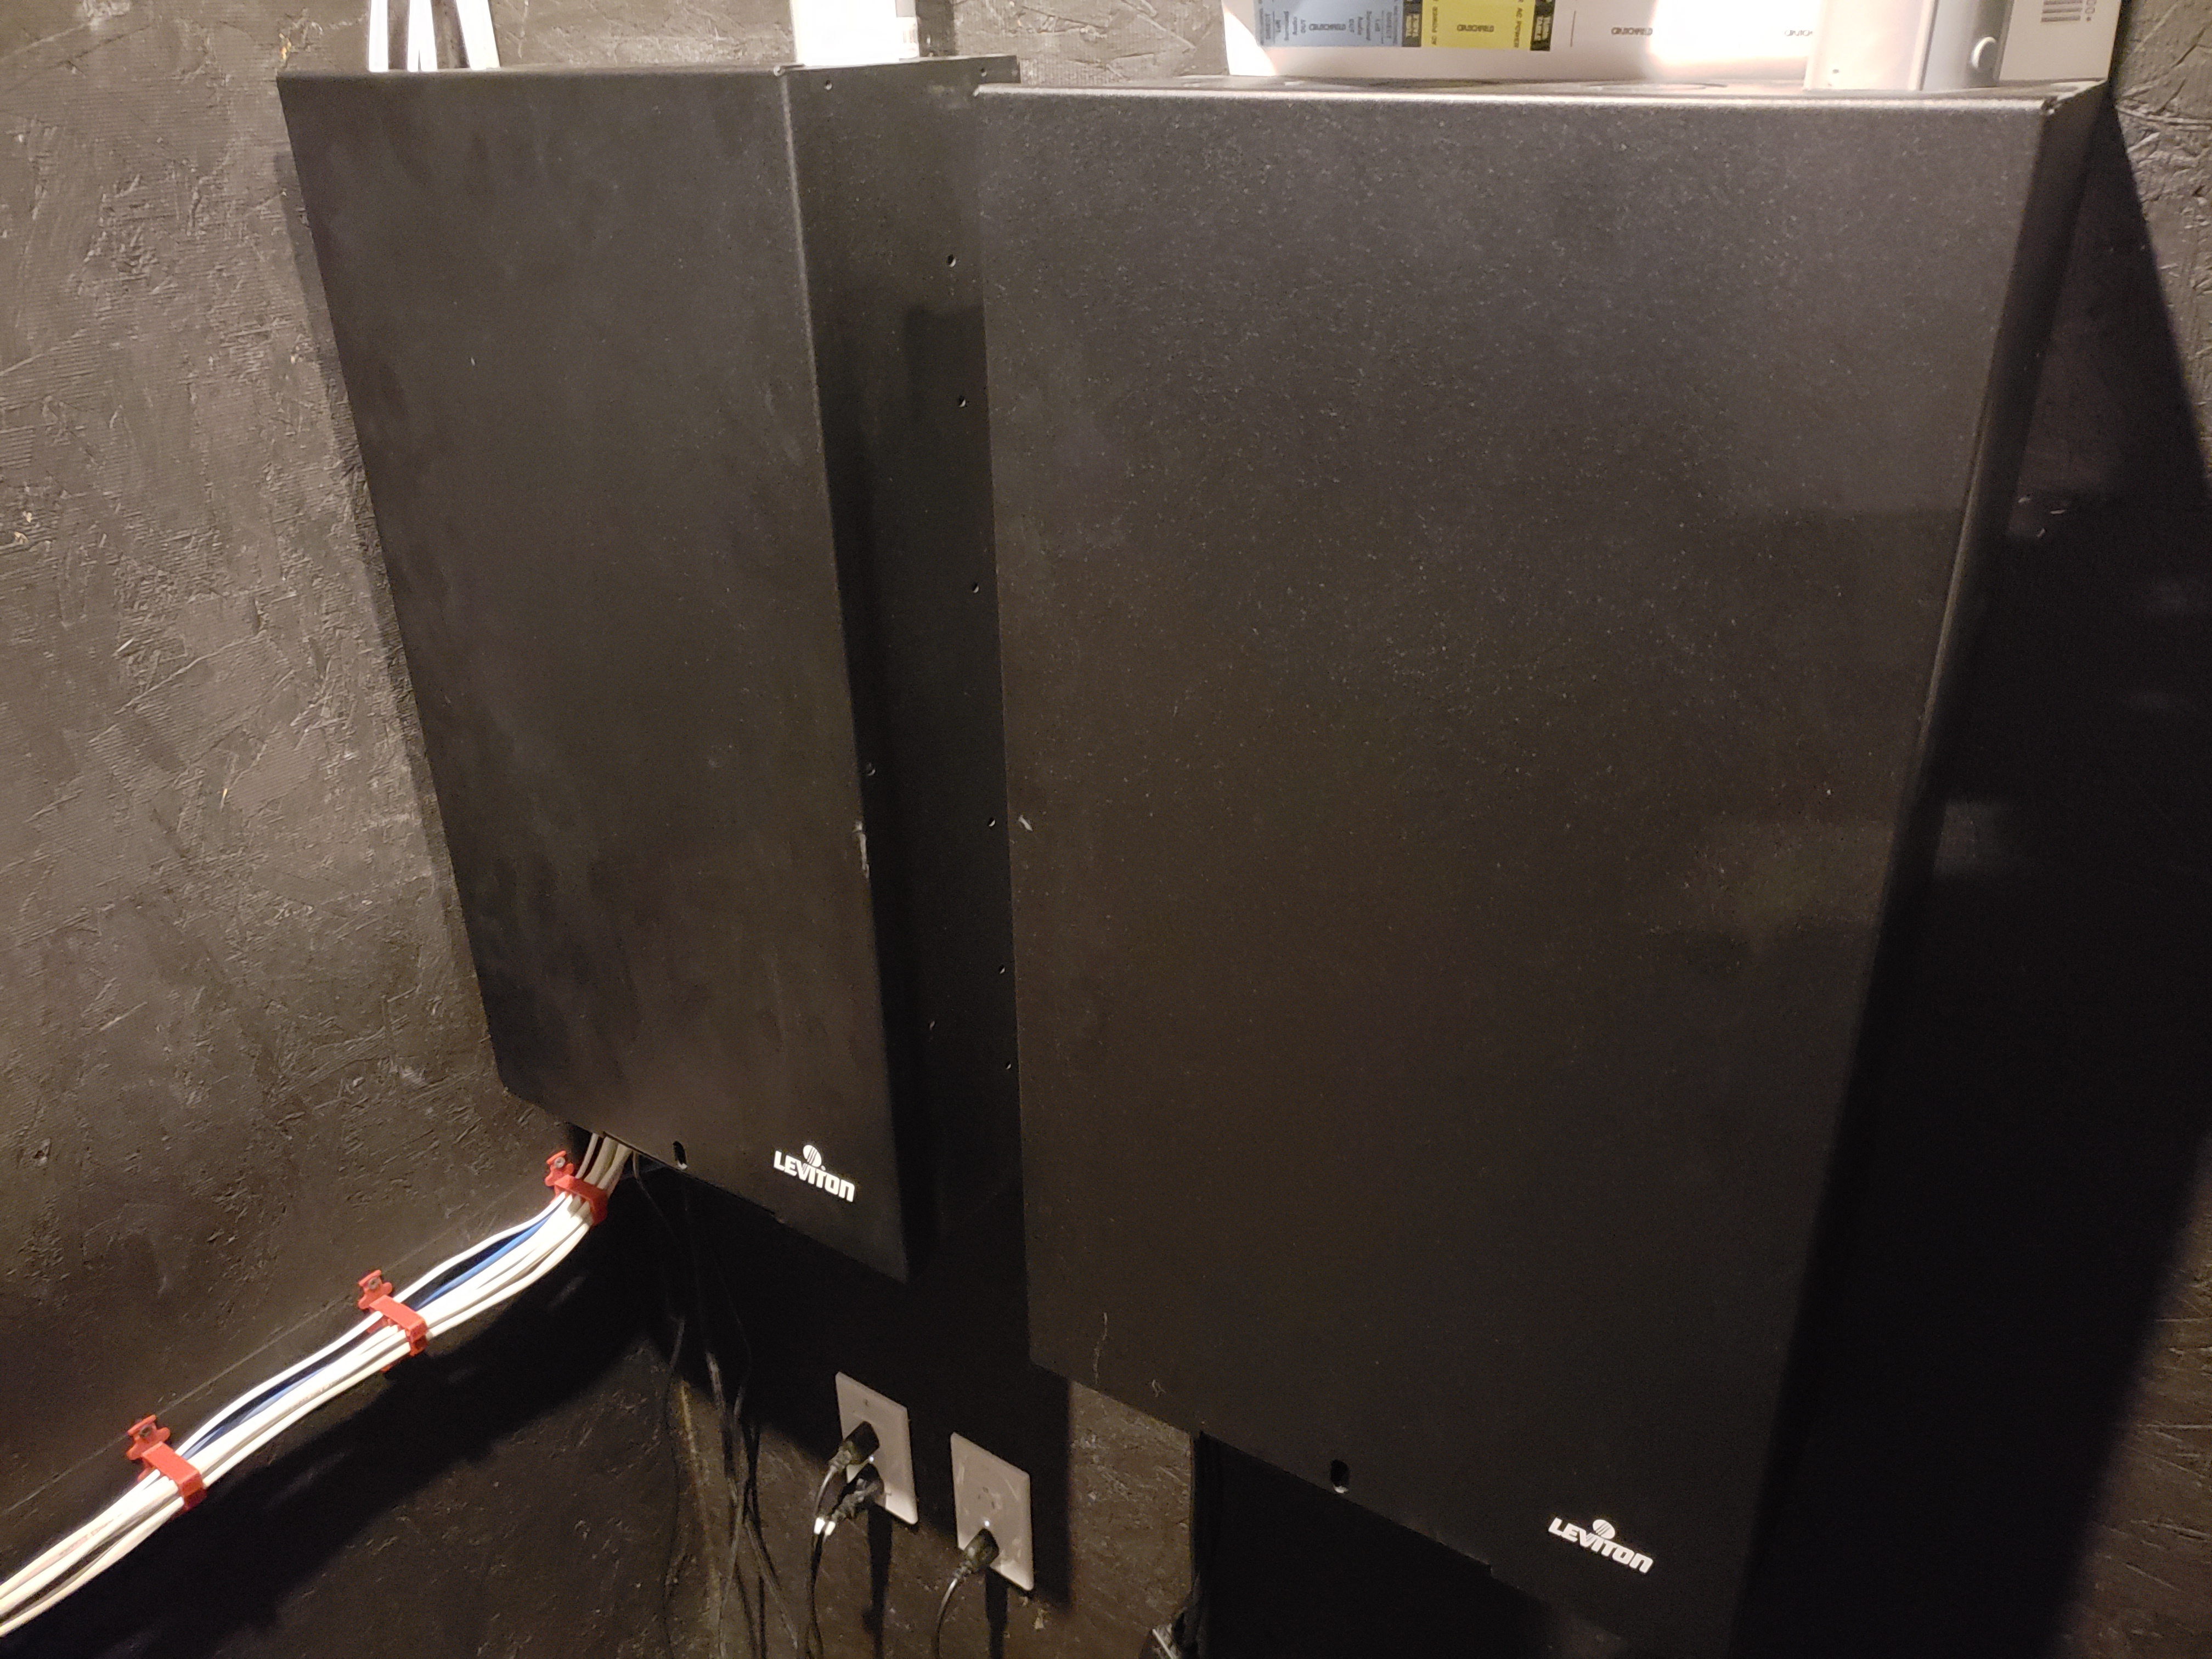
Structured Media Cabinets
The image below shows how you will wire the two Insteon 2450s to the motor control in a way that allows you to open and close the curtains with your Insteon compatible home automation controller.
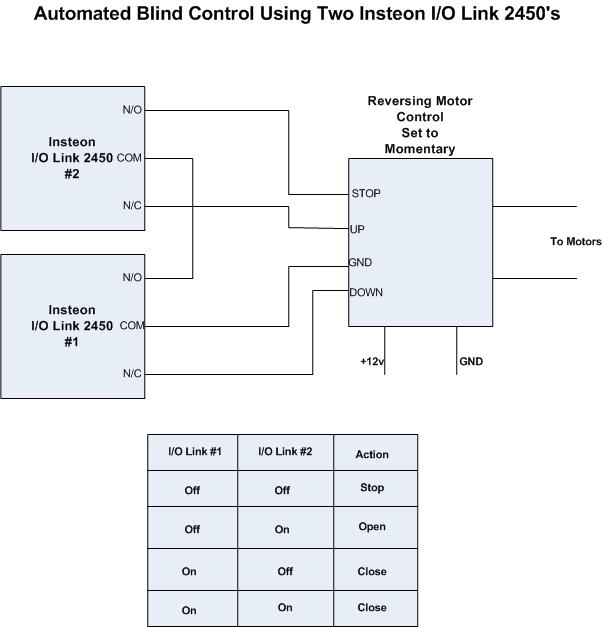
Insteon Blind Control Diagram
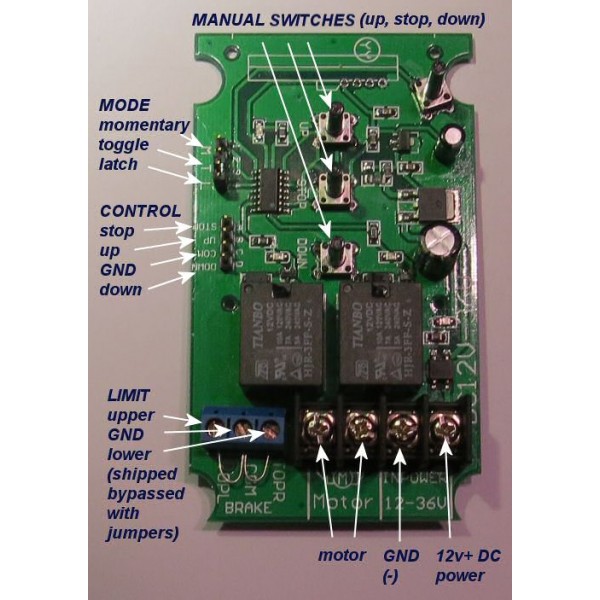
1 Ch. Blind Controller
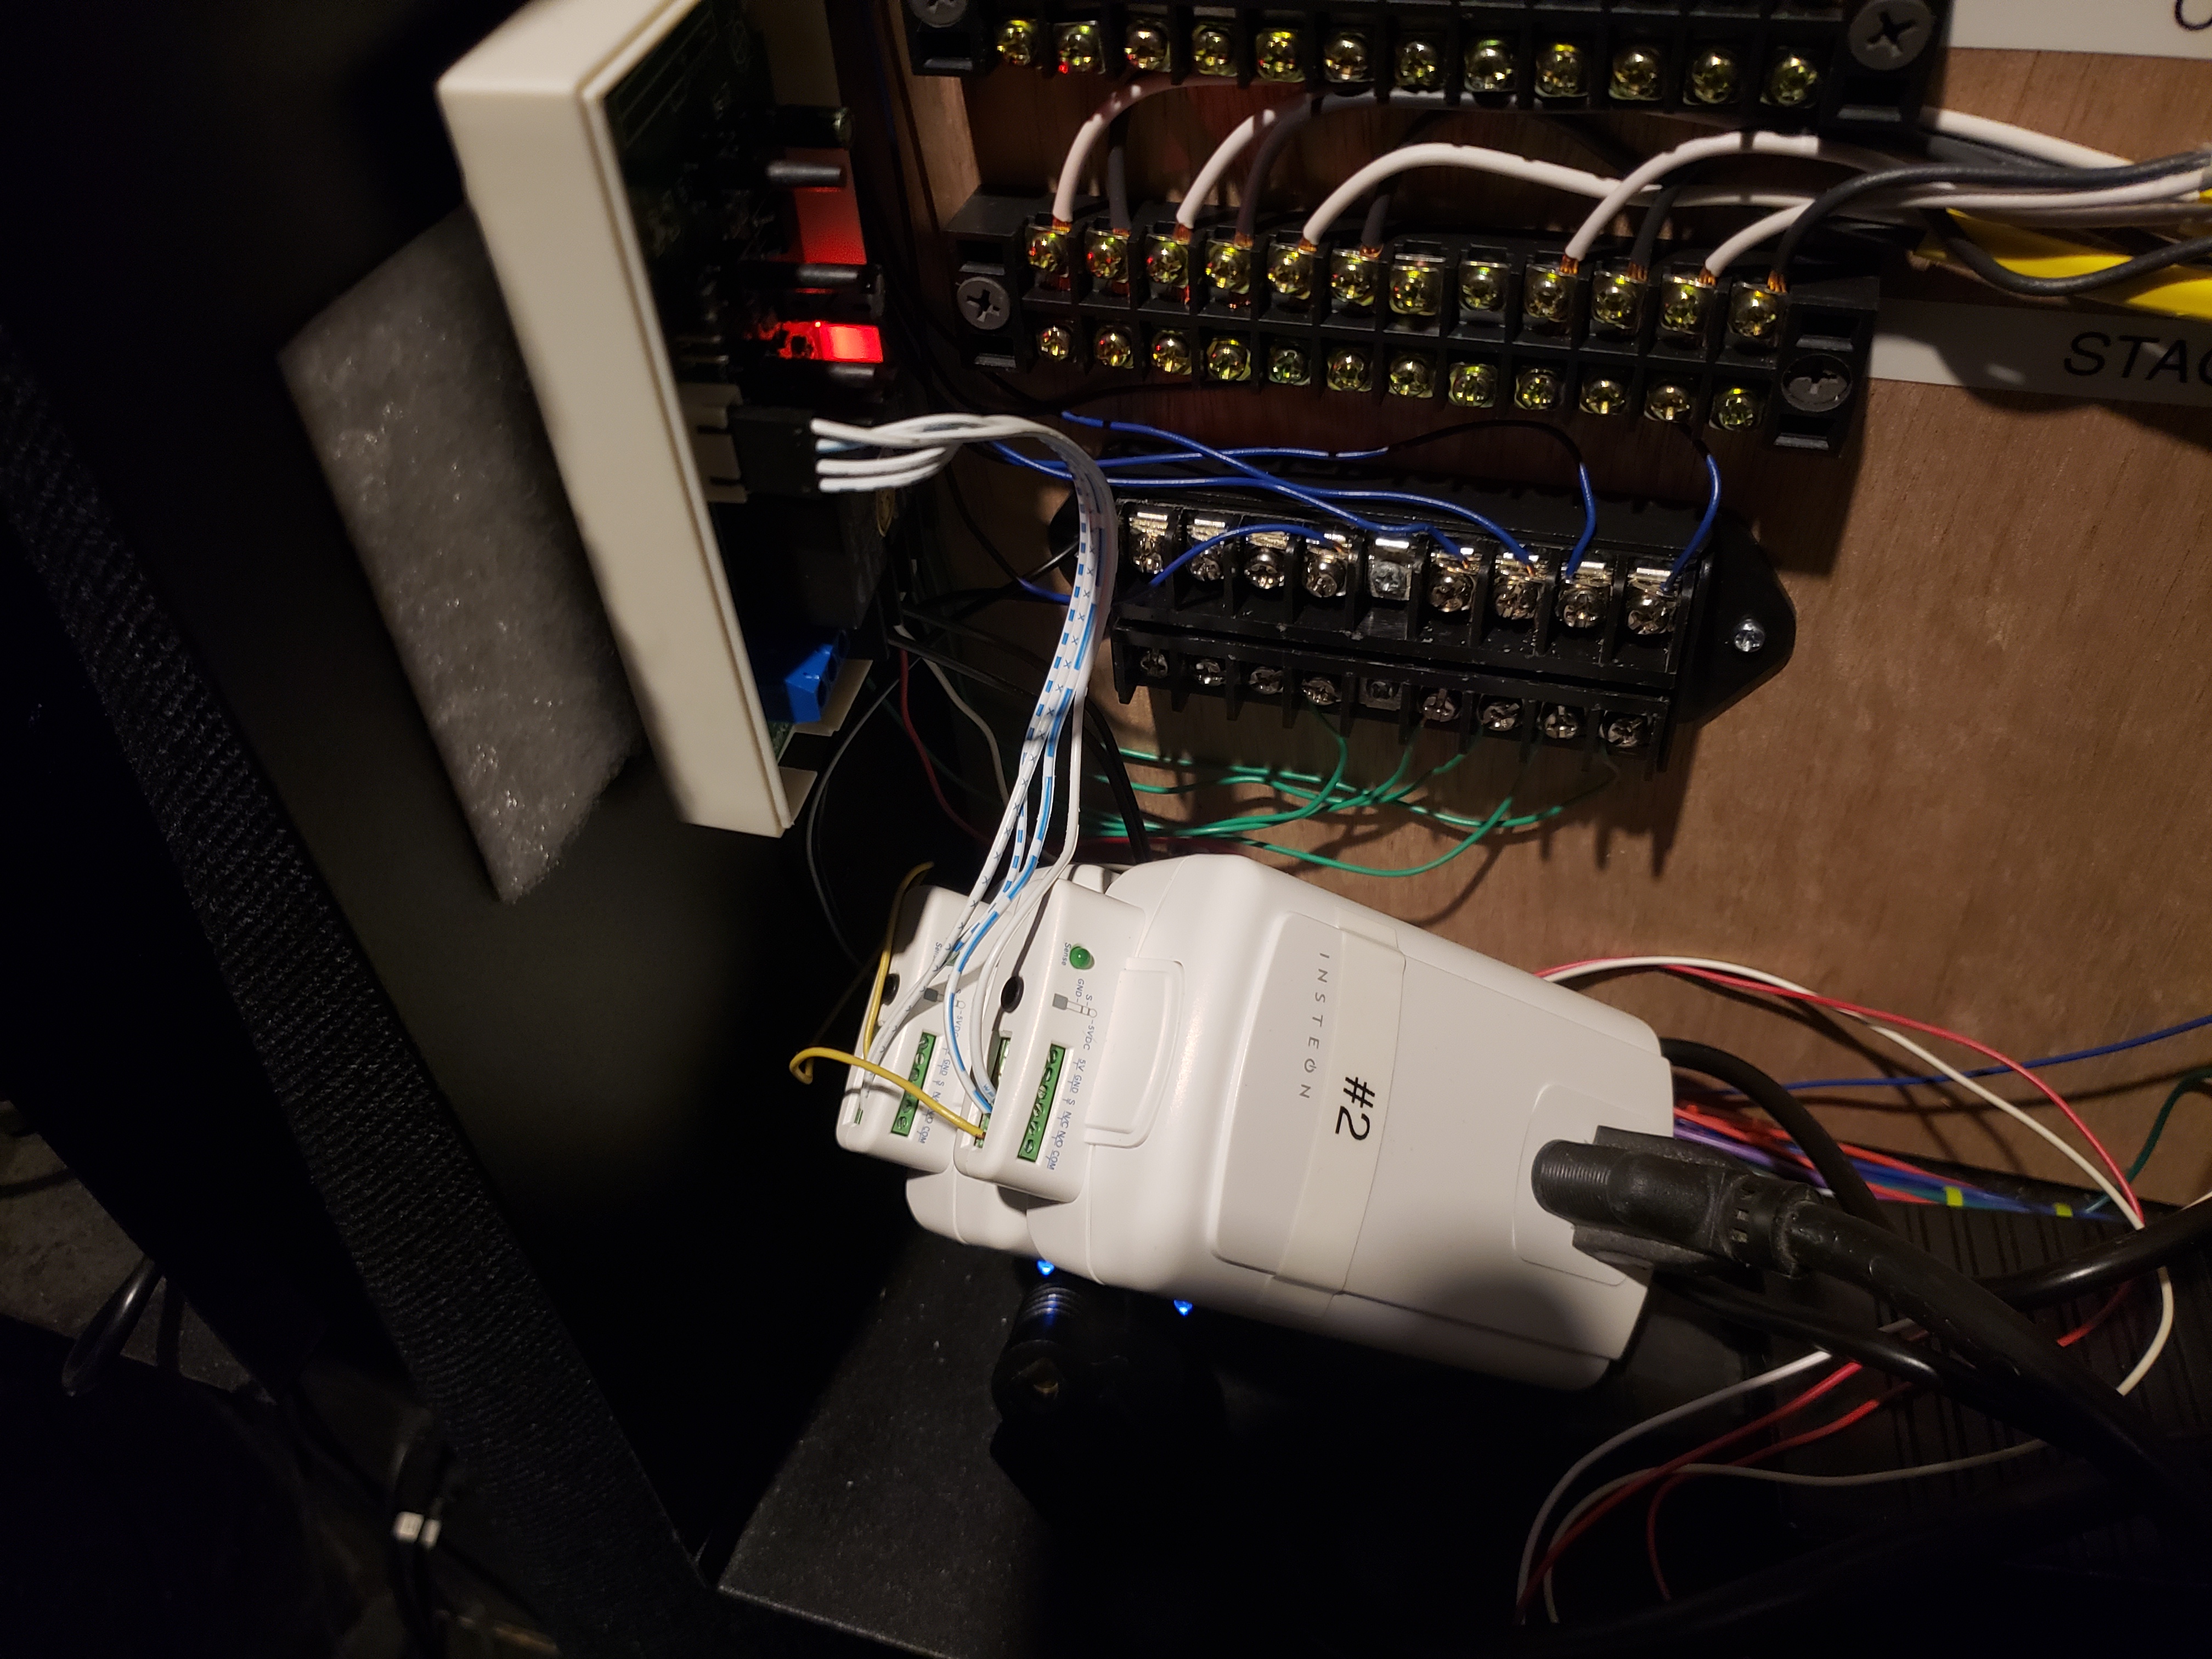
Blind Control
Programming the Motor
You need to set the travel limits on the motors, so that the curtains open and close to the proper locations. Use the 1 channel wall controller and the power supply to set the limits on each motor before permanently wiring anything.
These instructions can be found on Rollertrols site here. For your convenience I have copied them below. Note that since we are controlling curtains, in this case up (upper) and down (lower) actually mean open and close limits.
Masking Only Note: If you are using this for masking only, then you would want the close limit to be set to the spot where the curtains are masking out the white bars on the side of the 16:9 content.
Full Curtain Note: If you want the curtain to close and cover the entire screen, then set the close limit to the point where the curtains are fully closed. We'll handle the masking part with the programming later on.
The travel limits of these RollerTrol™ motors can be set and changed at any time . The sequence is as follows:
Activating the Programming Mode:
- Activate the motor in either direction with the UP or DOWN button of a switch or controller; we'll assume for these instructions that you will start with the UP button.
- While power is applied (the motor may not be running, if it has reached a travel limit), insert a screwdriver in the programming hole described in step 1 and hold the setting button down within six seconds of the power application start time. If you don't do it within 6 seconds, remove power, then re-apply power again (you'll have another 6 seconds to do it). Continue holding the setting button down until you hear a quick sequence of short beeps, then release the button. If the motor is running, it will stop, even though you are still applying power. REMOVE POWER FROM MOTOR.
- At this point, the motor has entered into its limit programming mode. Even though you have removed power, it will remember that it is in programming mode. You must complete the programming sequence or it will be permanently in programming mode.
- Apply power again for the UP direction, and it will continue running in that direction. Let it run until you are close to the desired UP position, then STOP it (do not let it go past the desired UPPER limit).
Setting the UPPER Limit:
- At this point of the programming mode, and you have moved the motor so that it is close to the UPPER position limit (but not past). When you stopped it, you removed power from the motor, but it has an internal memory that 'remembers' that it is in settings mode. Activate the UP direction of the motor; the motor now enters the 'JOG' mode. You'll see the motor move in very short steps that are a small fraction of a full rotation. Alternate between UP and STOP modes until your motor is at the exact UPPER limit you desire.
- The UPPER limit has been reached at this point, and the motor is still in 'programming mode', even though it is stopped without any power applied. The next step will be to press the DOWN button, which will set the UPPER limit into memory (you'll hear a confirming beep sequence), and it will also start the shade moving in the opposite direction. Do not press STOP until it gets close (but not past) the LOWER travel limit.
Setting the LOWER Limit:
- At this point you have stopped the motor, ready to enter JOG mode. Press the DOWN button and you will see it move slightly; you are now in JOG mode.
- Alternate between DOWN and STOP modes until your motor is at the exact LOWER limit you desire. Make sure it is stopped, with no power applied when you reach the desired LOWER limit.
- To confirm the LOWER setting and exit the programming mode, press the UP button; you will hear a beep sequence. At this point, the travel limits for the motor have been set and the motor is now back in normal running mode and you should be able to test the full excursion. Repeat the above steps if you need to reset the travel limits.
We sincerely hope you enjoy using these advanced motors; if you have any questions, please feel free to contact us at any time!
Home Automation Controller Programming (ISY 944i)
I use an ISY 944i home automation controller. Below are the programs I wrote to open and close the curtain with the Insteon 2450s. You will need to program your controller to do the same.
Fully Open
This is the 2.35:1 setting in my case. It's the setting you use to have the entire screen exposed. Make sure the program is active long enough for the curtain to reach the fully open motor set point that you set above when programming the motor.
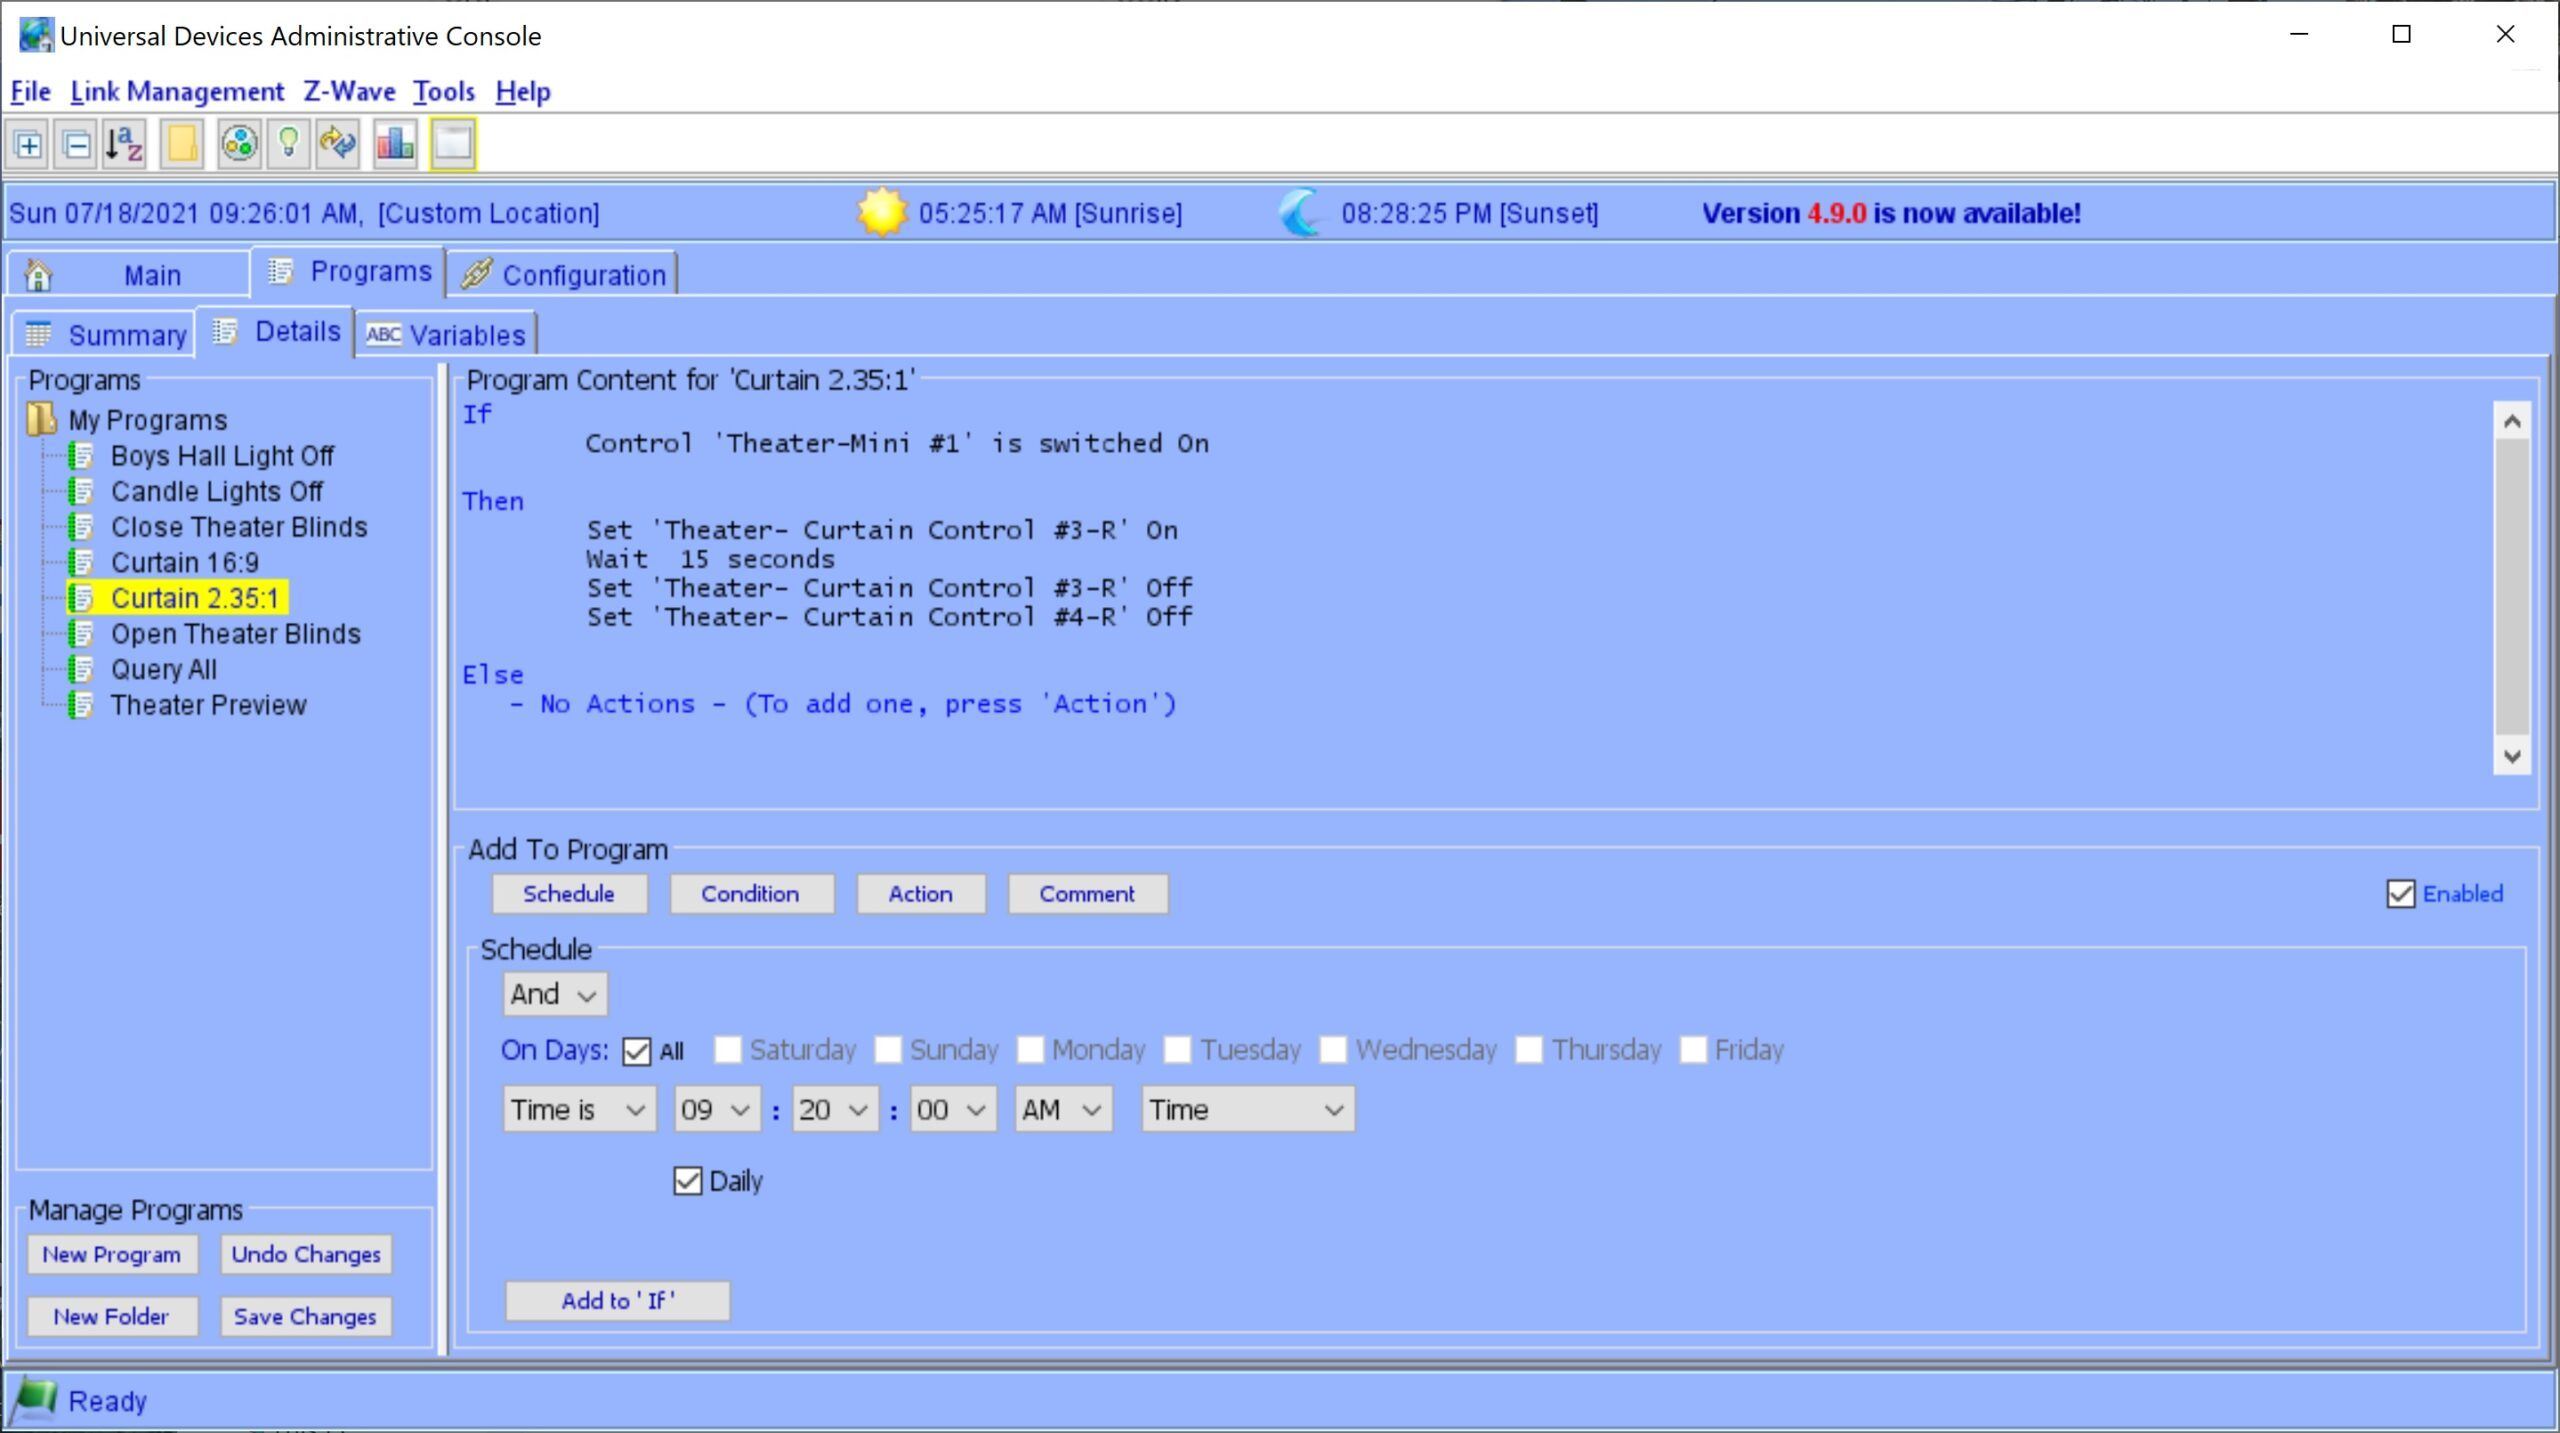
2.35:1 Program
16:9 Mode (or Fully Closed)
This step will be different depending on whether you programmed the motor set point to fully close the curtain or just close it to the 16:9 masking point.
Masking Only: Mine is only used for masking, so I programmed the motor to stop at that point. The home automation controller program for that is below.
Fully Close: If you want the curtain to fully close, then you would use this program to close the curtain, instead of using it as the masking setting. To have it mask, you would create a program that fully opens the curtain and then begins to close the curtain on a timer. Have that timer stop the motor at the point where the curtain masks out the white bars on the side of the 16:9 image.
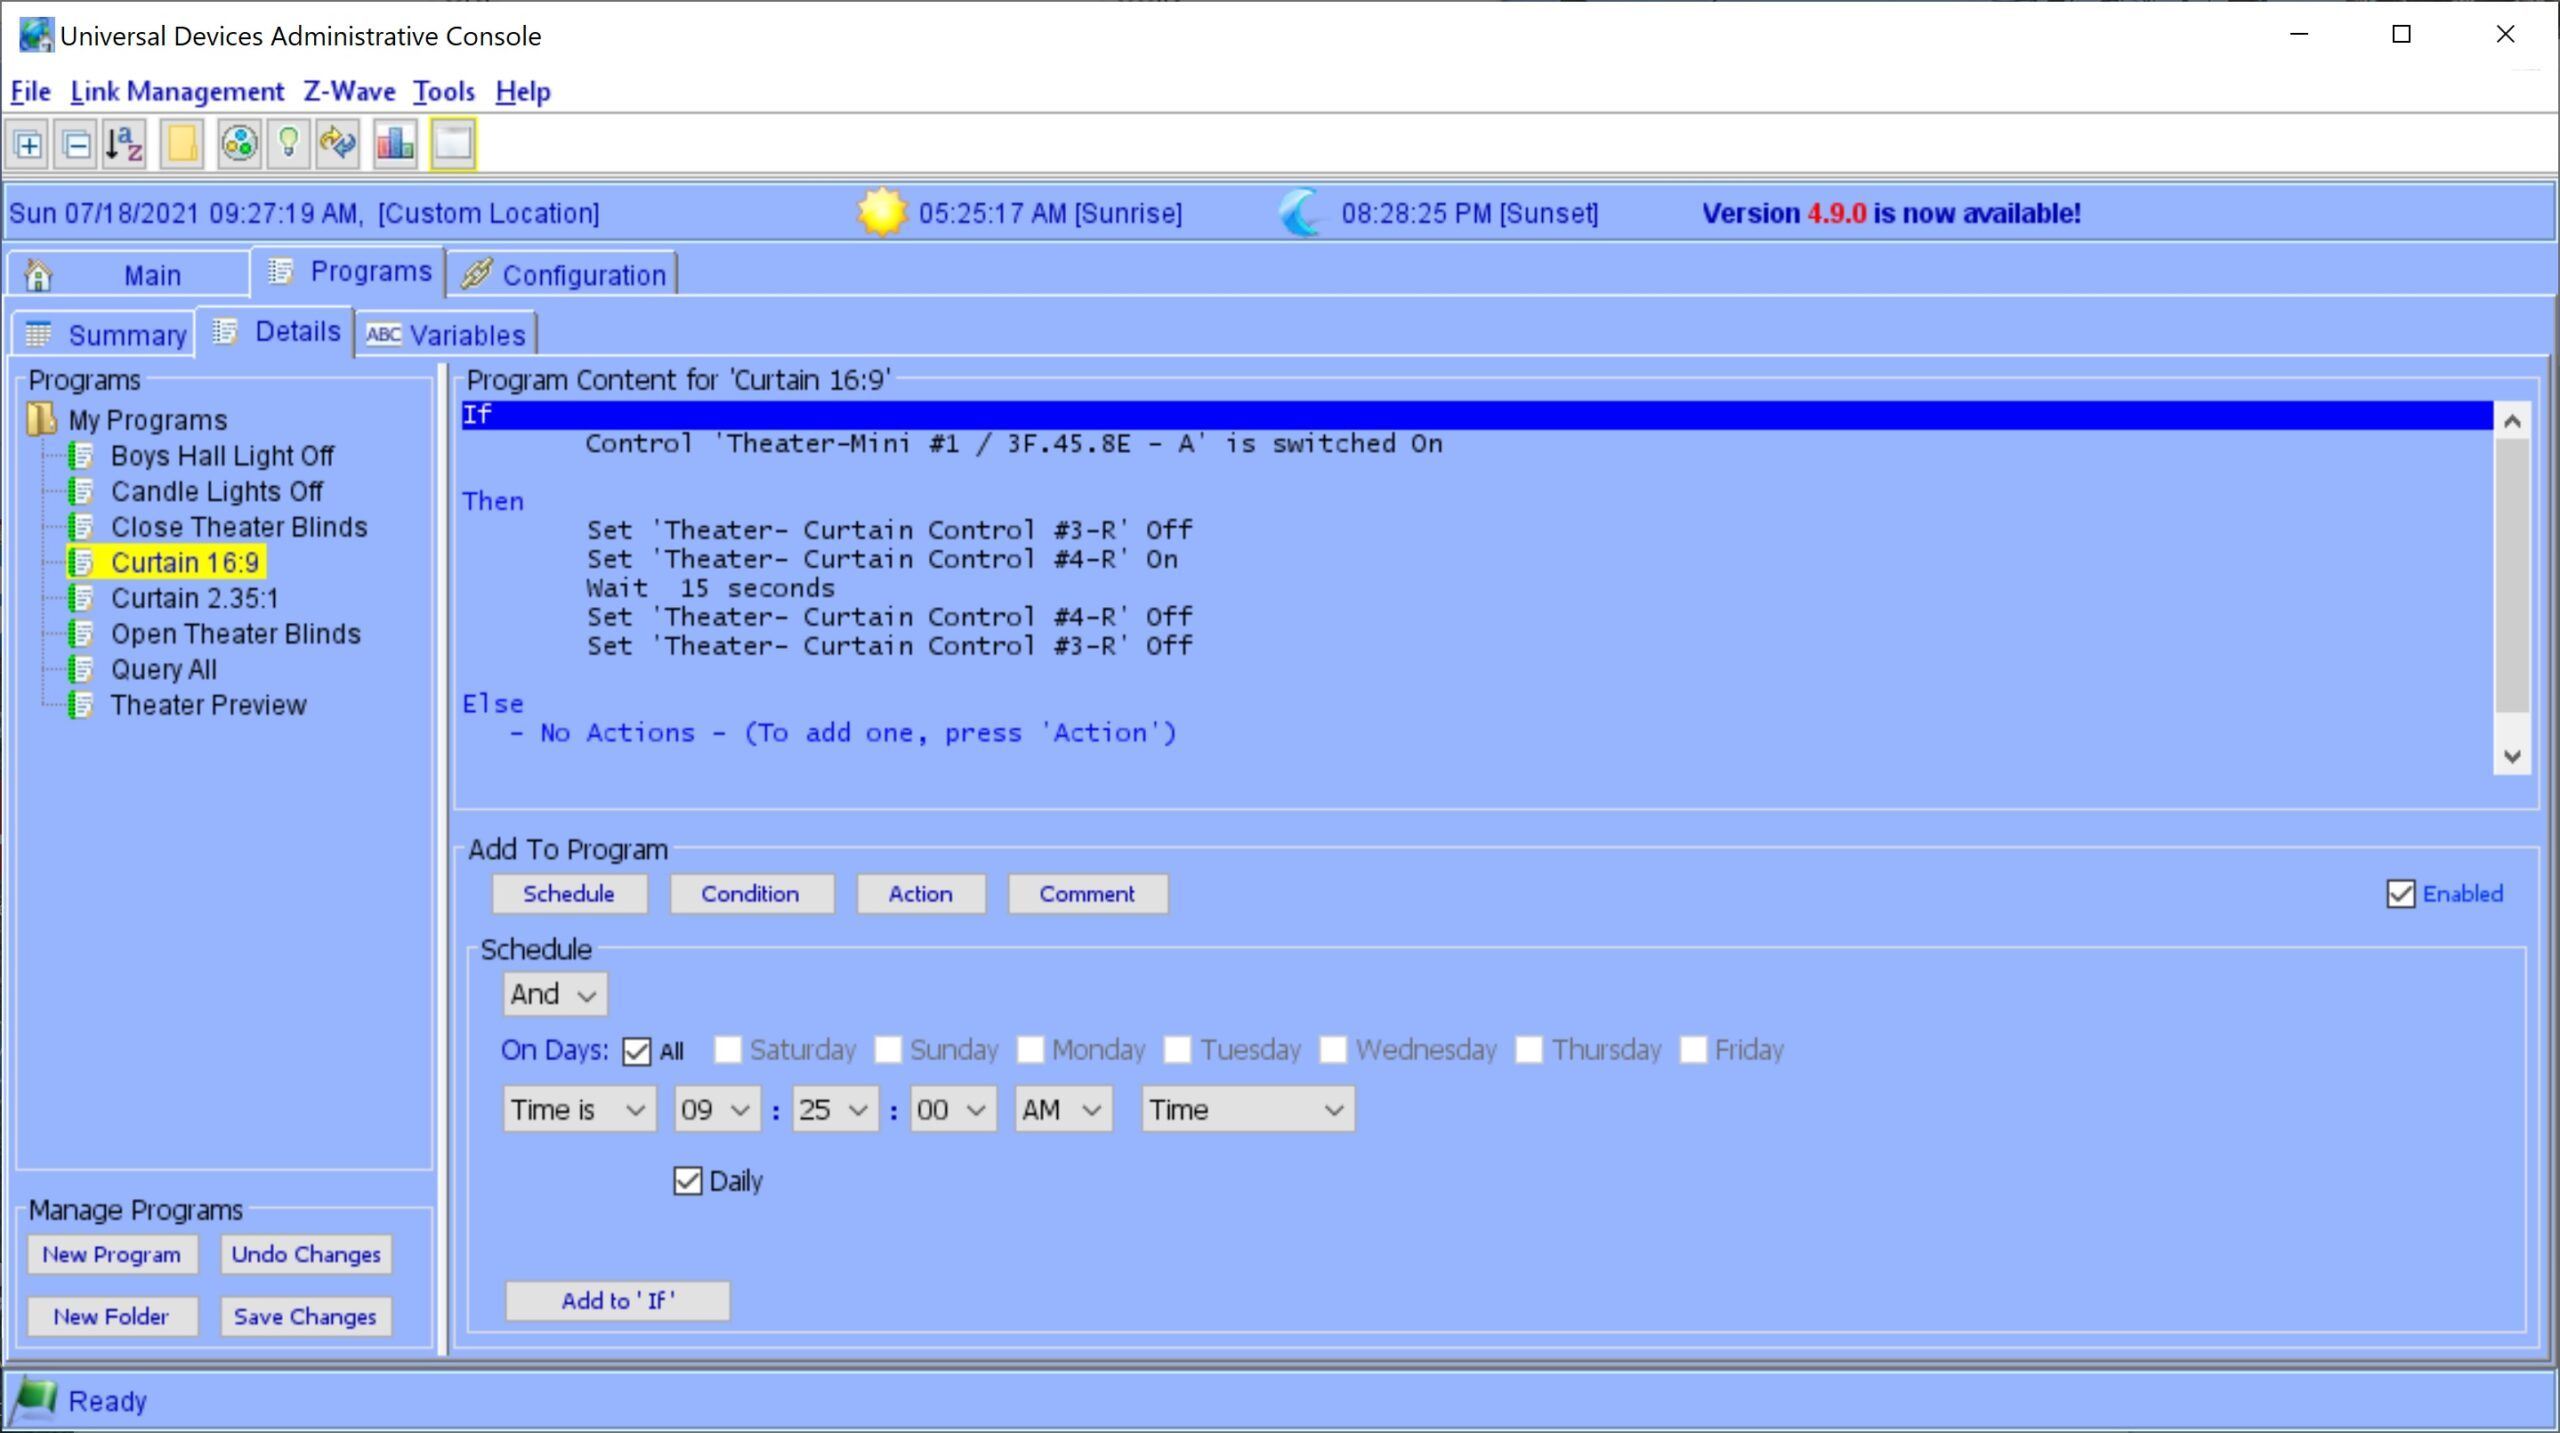
16:9 Program
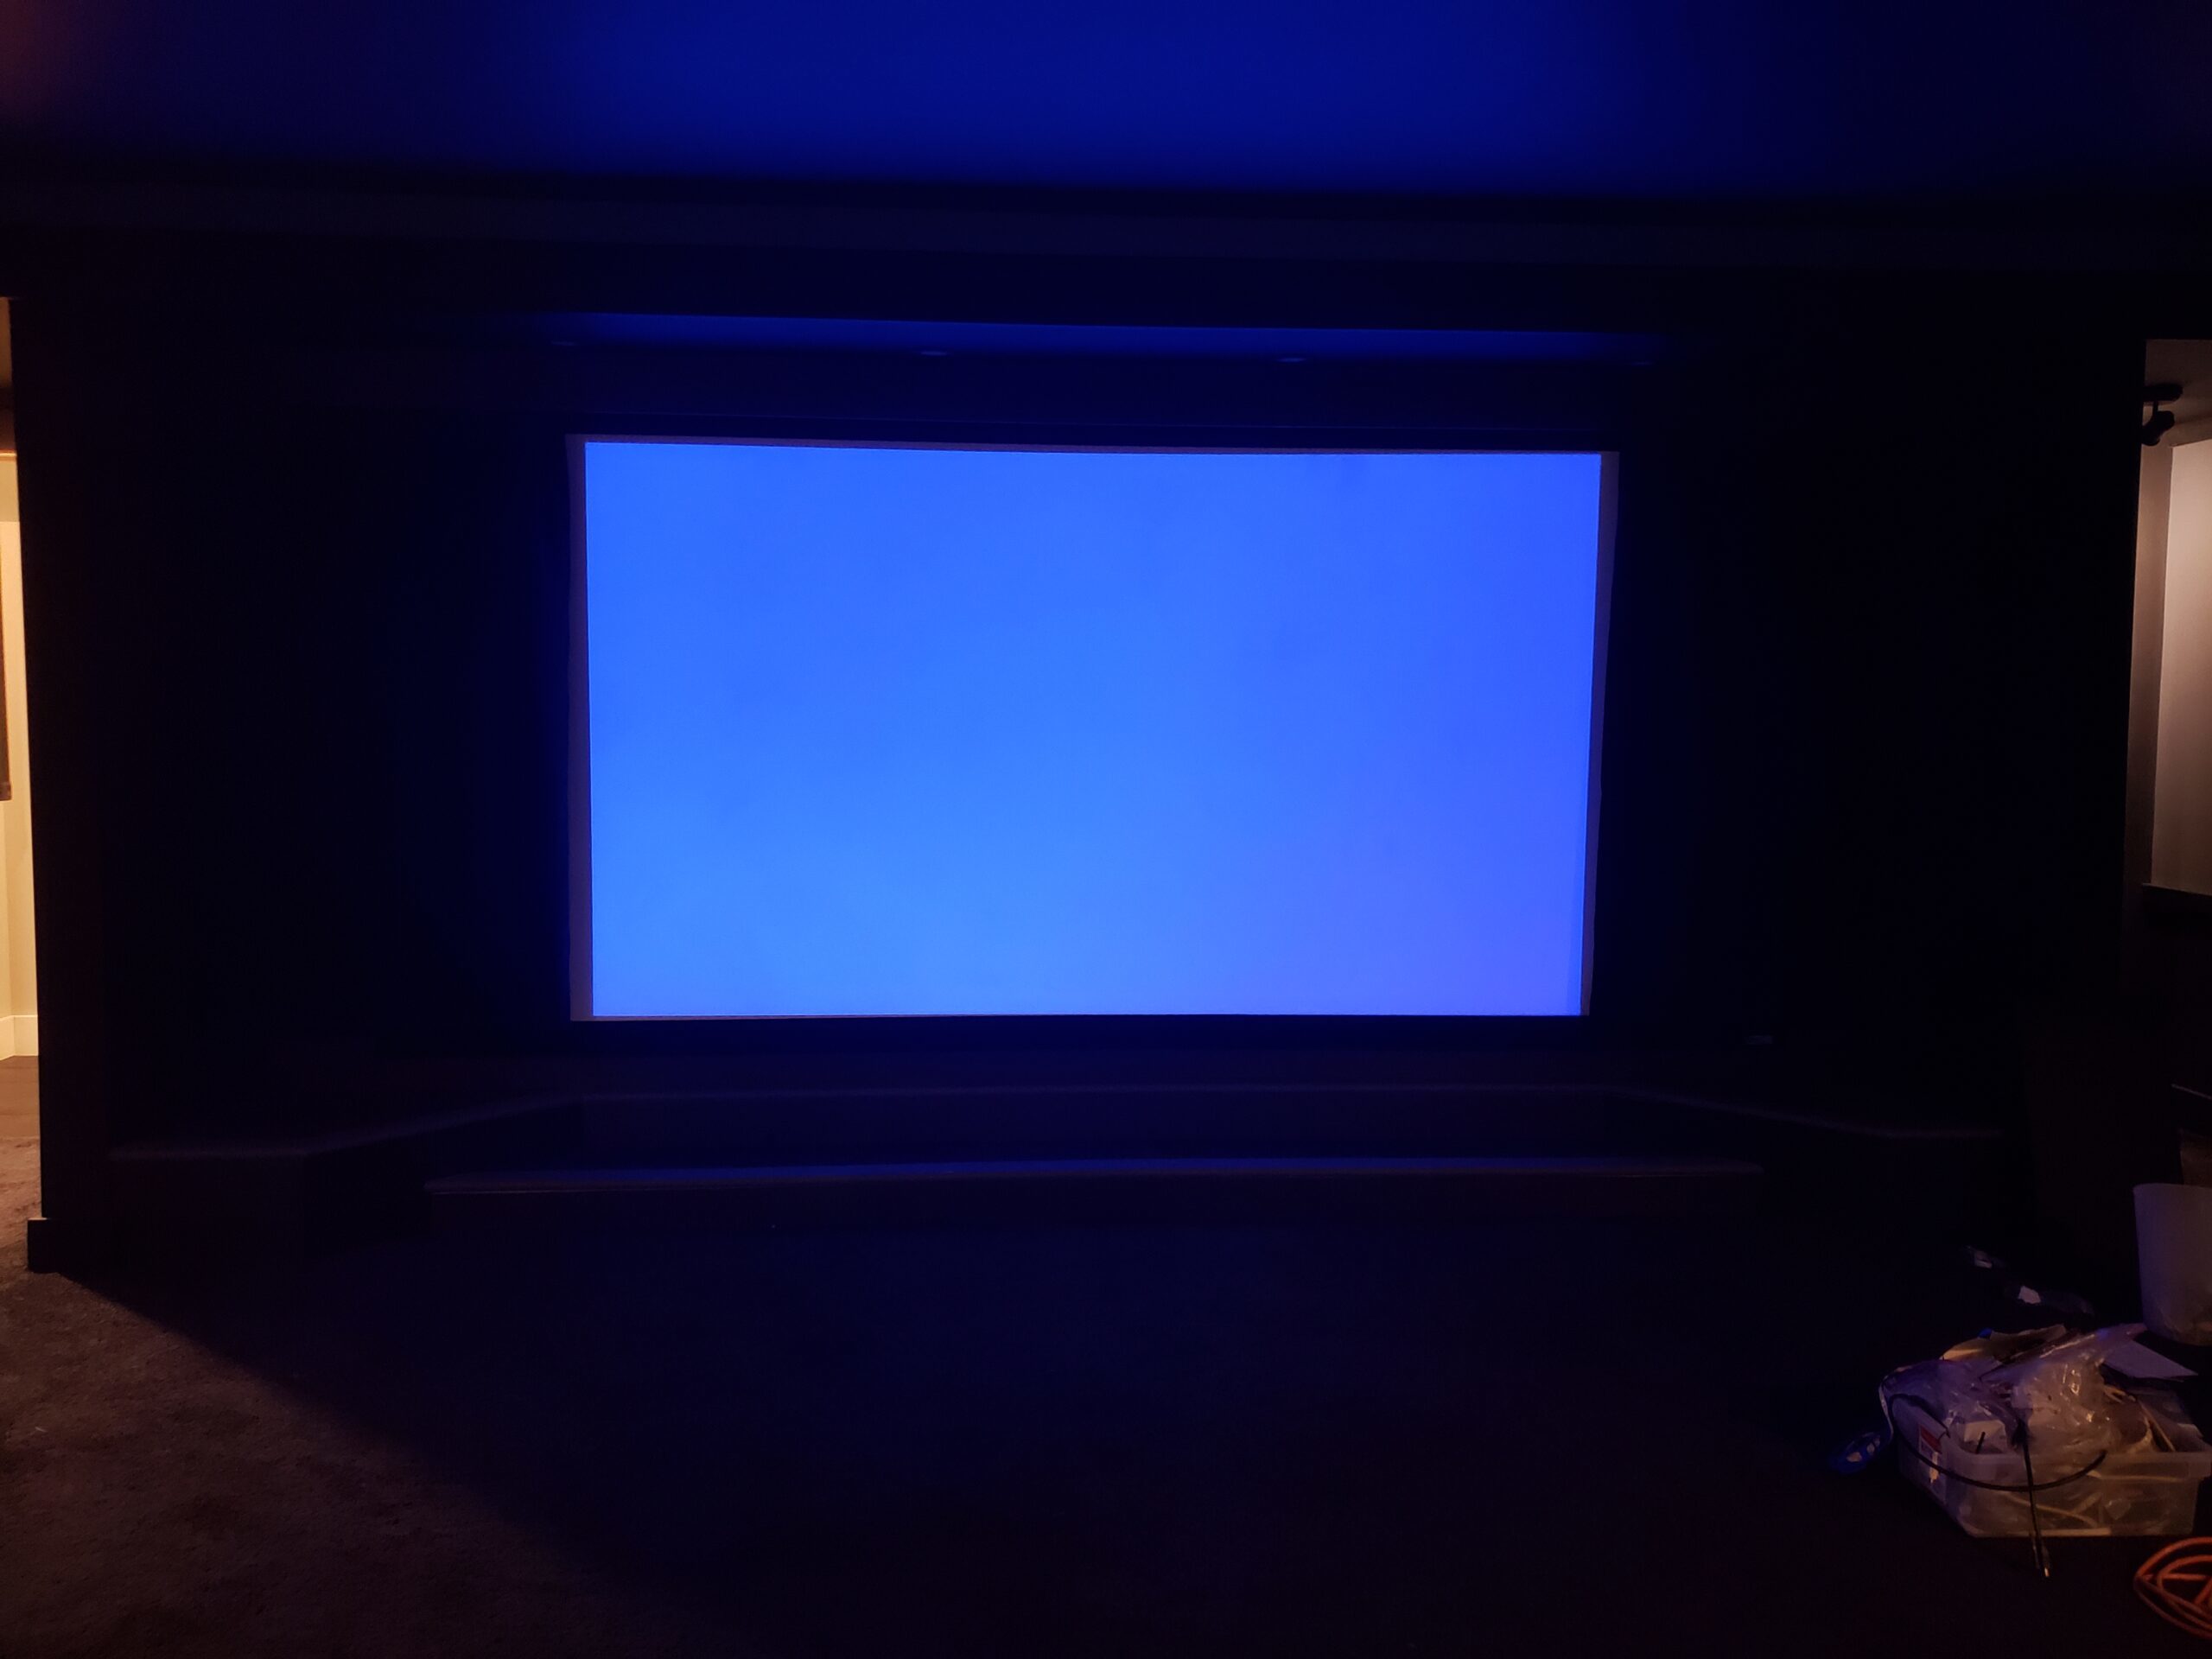
Masked Screen
Conclusion
Another fun and cost saving home automation project for your home theater. I hope this helps you to create your own automated masking system. Please leave a comment and/or question either here or on the YouTube video. Thanks, Tim

